Tuesday 25 December 2012

Desperate Measures...

First off, a very Merry Christmas to all who celebrate this holiday! I hope that no matter what your beliefs are, you are surrounded by friends, family and joy!

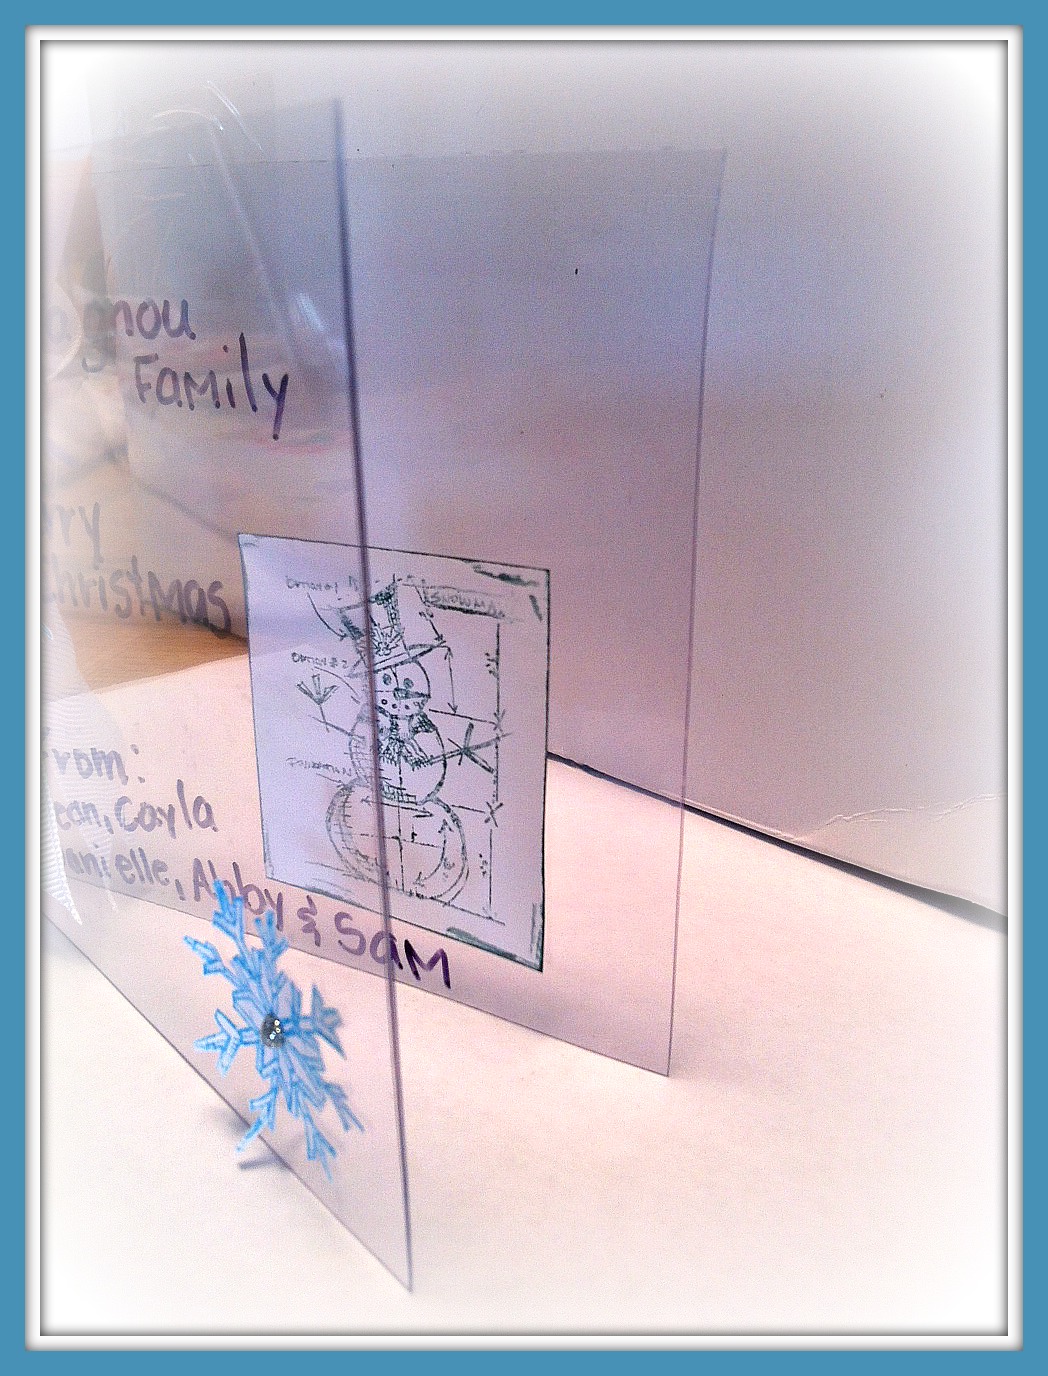
So now as my family sits on, glaring at me for blogging on Christmas day, I must share this quick card that I just created! I was a bit desperate as all my scrapbooking stuff is in Saskatoon and I am not! But I scrounged my mother-in-law's house and found some crayola markers, glitter glue and glue stick from her teacher's stash, computer paper, scissors, some recycled packaging from one of my daughters gifts, ribbon found on my other daughters present and using the beautiful Stampers Anonymous/Tim Holtz stamps that my son gave me for Christmas I was able to create a last minute card to give to a family who was cooking us Christmas day dinner.


The background was made using the clear part of barbie packaging. The images were made by coloring the stamps with the Crayola markers, stamping them on plain old computer paper and cutting them out. I used a glue stick to stick everything on.

The snowflakes were adhered to the outside of the card and the snowman is adhered to the inside. I distressed the edges of the snowman piece with the markers as well.


I then tied a piece of present ribbon around the front cover and added some Crayola glitter glue to the center of the snowflakes! And there you have a desperate measures Christmas card!
:D

Happy Holidays to you all!
~Cayla~


Friday 7 December 2012

Christmas Craft & Bake Sale...

Good Morning! 

This Saturday from 10am-2pm I will be at the
So be sure to stop in and say "Hi"! 


You won't want to miss out on this!
There are going to be some very creative people with tables set up, selling some of their handmade craft items such as beautiful greeting cards, mini albums and home decor items that make excellent gifts for Christmas, handmade embellishment to add a unique touch to your crafty projects and of course some delicious home-baked items!
We will also have the very talented cupcake lady, Sasha Libby with her VERY awesome gourmet cupcakes! That alone would make stopping by well worth your trip!

So stop in and check it out!

Here is a sneak peak of some of the items I will have available at my table...


Hope to see you all tomorrow!
~Cayla~


Wednesday 5 December 2012

Christmas Advent...

Every year for the past 4 years now, I have been doing this advent calendar. I bought it as a kit from Kaiser Craft and decorated it with white paint and a really old line from BoBunny (so old that I can't even remember the name of it!) I loved that in the end it was not at all the traditional Christmas colors and it looked all blingy and shiney!

The first year I did it, I filled the drawers with little things (chocolates, little toys and so on) that I had found at the local Dollarama... my kids hated it! They were bored of it within the first couple days! 

So the next year I did something a little different. I decided to make it like a puzzle that they had to solve. I bought a family movie night package for one of the local theatres and printed a picture of it. I then cut it up into 24 pieces and hid a piece in each drawer. So everyday my kids would have breakfast and then they could open a drawer and get a new piece to the puzzle! I had to be very strategic about this cause I didn't want them figuring out the puzzle in the first week! My kids loved this! They were excited about it every morning and couldn't wait to get another piece! I did the same thing last year only it was for a Family Fun Day at Fuddruckers/Ruckers.

This year I have changed it up again and made it into a word scramble. I cut letters from a diecut machine to make a 24 letter sentence. I colored the letters of each word all the same color so that it would make it easier for my kids to know which letters belonged together to form a word. If at the end they still can't figure it out I have a couple hints to give them! Then I placed a letter in each drawer which they will then get to open one drawer every morning! (I was a little behind this year and they just started it this morning! But since they got to open five drawers all at once so it was all good! Lol!)

But here is my advent calendar...


 I did have this sitting at the store for a bit so some of you may have seen it! My lovely co-worker Jennifer also has one done up at the store and they are both so different but just as equally lovely!

The store also has a few of the Kaiser Craft kits left for any who may be interested! :D


My tip for you if you are going to do one of these Kaiser advent calendars is paint/stain/glimmer mist the wood & chipboard when it is all flat and not put together. I didn't and it took a bit to get into all the little cracks and stuff. I think it would have been easier to do it before it was put together.


It's hard to tell but I used clear photo corners on the photo mat so that every year I can change the picture! Another thing that is not noticeable in the pics is how I did the little drawers. I actually never painted or did anything to the actual drawer except on the fronts of them, where I covered them with paper and added the numbers, rhinestones and ink of the edges. So the sides of the little drawers are just the plain raw color but you would never know because they really don't get seen!


The snowflakes were made using the Cricut (Sorry, I don't remember what the cartridge is called... I had borrowed it from a friend!) I cut several different sizes and layered them together after using Glimmer Mist on the top snowflakes.

So stop in at the store and check out Jennifer's advent calendar. It's beautiful in the more traditional Christmas colors of red and green!

Thanks for stoppin by!
~CAYLA~


Tuesday 20 November 2012

Getting into the Christmas mood...

Hi there!

Today I just wanted to share with you a couple layouts that I did up a couple weeks ago using the new Bo Bunny Christmas lines.

I was once again inspired by layouts that I saw in magazines. The first layout can be found in the September 2009 issue of Scrapbook Trends on page 113.


I loved how the circle came out from behind the picture and how it circled the title and brought your eye back to the picture.


In my layout I chose to do the circle with rhinestones using a template I have called Dots All Around from Crafters Workshop. I used the rhinestone because I thought that it would add that Christmas sparkle.The paper is from the Mistletoe line.


This second layout was also scrap-lifted from a magazine from the Scrapbook Trends magazine (Sorry, I couldn't remember which one and I don't have the time at the moment to search through my magazines to find it! And have I ever mentioned that I love this magazine? Check it out if you haven't yet! It costs a little more then most magazines but it is well worth with loads of ideas and has next to no ads!!!)


And the paper used for this layout was from the Rejoice line


My son and nephew was super excited about getting to be the "Elves" this year and hand out all the presents to everyone on Christmas eve, which is when we open our gifts. They even stuffed little pillows into their shirts to get the round belly!


Thanks for stopping by!

~Cayla~

Monday 12 November 2012

A Little Pinterest Inspiration...

So while at Crop & Create last weekend I did some amazing projects. So as promised in my last post, here is my favorite project I completed!

I took an excellent class call Xryon Pinterest Inspiration taught by the talented Beth Kingston and it was an amazing class! Although I had heard of the Xyron adhesive products, I had never really used them or understand exactly how easy they could make your craftly life!!

In the class we created several little projects, most of which I did not finish in the actual class but took home and put the finishing touches on them.

My favorite project was this awesome ornament star! 


In the class Beth should us how to cut strips of paper and run them through the Xyron Creative Station to create instant sticky backed strips! It was so simple and way easier then using Modge Podge and there is no drying time!
You can find the star and other shaped ornaments at Micheals for a very reasonable price.


After covering the star completely with the strips of paper, I chose two Tattered Angels Glimmer Mists to color the star (I used an olive green and a blue).


I then just chose some coordinating flowers and hot glued them on and added other matching embellishments.


I fell in love with Maya Road this weekend and all their super cute little embellishments. It is kind of hard to see in this picture but I added one of there Mini Bottle Caps and placed a rhinestone in the middle.


The green flowers were just plain white flowers that I used glimmer mist on to match and I purchased them at Dollarama. The blue flowers are by Prima Marketing.


The cute little pins sticking out of the star where also made during the glass with the exception of the leaf pin which is another Maya Road product. To make the star and the tree we just used punched out pattern paper and layered them over the pins.
Beth had an excellent suggestion and told us to use regular threading needles which can be found cheap at just about anywhere!
 Love it!!!!

Beth was full of great knowledge and I wish I had had the foresight to have brought a pen and jotted down some of her crafty suggestions! But one thing I do remember was how to make your own foam adhesive! Micheals carries a ton of craft foam in the kids craft section. Some of which has adhesive already on the one side! Beth suggested to buy the adhesive backed foam and run the other side through the Xyron Creative Station and poof... you have your own foam adhesive for super cheap!
I unfortunately do not have a Xyron Creative station but in the class Xyron sent a Teresa Collins Sticker Maker which will run 1 1/2" strips through! So that should work just fine and I would have to cut the foam down anyway, right?
I have to say a huge thanks to Beth and to Xyron for the great class! I really enjoyed it and if you ever get the opportunity to take one, do it! you won't be disappointed!

Sunday 11 November 2012

Crop & Create

Well I survived my first Crop & Create Event with success!
Here are a few pics of what I was upto!


Look at us cute and fun ladies!


I must say that the goody bags waiting at our table were fantastic!! Scrapbook & Cards Today magazine had some great sponsors that filled our goody bags with scrappy goodness!


There were also some amazing make 'n takes! Some of the companies that sponsored this event sent out some great ladies to show us their products and how to use them! 


I have to say, my fave make 'n take was one that Beth Kingston (from Xyron) did with us. It was a beautiful and oh so simple necklace. I love when the make 'n takes are not just about scrapbooking. All we did was stamp a partial butterfly onto a small 1x1" square of pattern paper and then place it onto a square metal pendent on a chain. We then placed a clear square epoxy bubble over it, which was held on by a small drop of Glossy Accents. 


Another great part of this event was the amazing dessert buffet that was spread before us both evenings! There were all sorts of cookies, squares and cakes and a bunch of fruit for a chocolate fondue! I thought these little cakes were so cute. They reminded me of the little cakes that Alice ate to make herself small while in her journey through Wonderland!


I also signed up to take a class while I was at Crop & Create. There were several classes to choose from and they all sounded awesome. But because I am absolutely addicted to Pinterest, I decided to take the Xyron Pinterest Inspiration Station class created & taught by Beth Kingston. And I was so NOT disappointed in the class!
We created so many cute projects and Beth taught us some really great tips and techniques! I had never really used any of the Xryon products but was amazed at how well they worked and can see how they really could make your crafting easier! I highly recommend learning some more about the products if you haven't had a chance to yet! 
I am going to do another post in the next couple days once I have had a chance to gather my thoughts completely on this class and share with you some of the great suggestions Beth had to offer!


For now I am going to leave you with this little sneak at my favorite project of the weekend!
See you soon!

Below is a list of the companies that sponsored Crop & Create! Be sure to check them out!


Thursday 1 November 2012

Halloween aftermath...

Well I hope you all had a fabulous and fun Halloween! I know my kids did! I just wanted to share a few pics of my little goblins!


This was yesterday morning after I did up Danielle's hair. They don't actually get all dressed up until lunchtime but because I had to work a day shift yesterday, they only time I had to help with the hair was before school! But I think Danielle was okay with getting all the extra attention. :D


And this is the finished get-up! I was pretty impressed with how it all turned out. Danielle and a bunch of friends come to the house for lunch and managed to get her all done up WITHOUT turning the house into a disaster zone! That's an achievement all on it's own! Lol!


Sam is so obsessed with Star Wars at the moment and so this is my little Trooper guarding his loot from his Momma (who has a serious sweet tooth! LOL)


So I gotta run now. The kids are at school and I have some raiding to do! But lets keep that between you and me! :D

Thursday 25 October 2012

It's Been Awhile...

Hi All! Sorry it's been awhile. I have been busy, busy, busy!

I just wanted to share with you today a couple of layouts I have been working on. I have actually had some time in the last week to do some scrappin'!


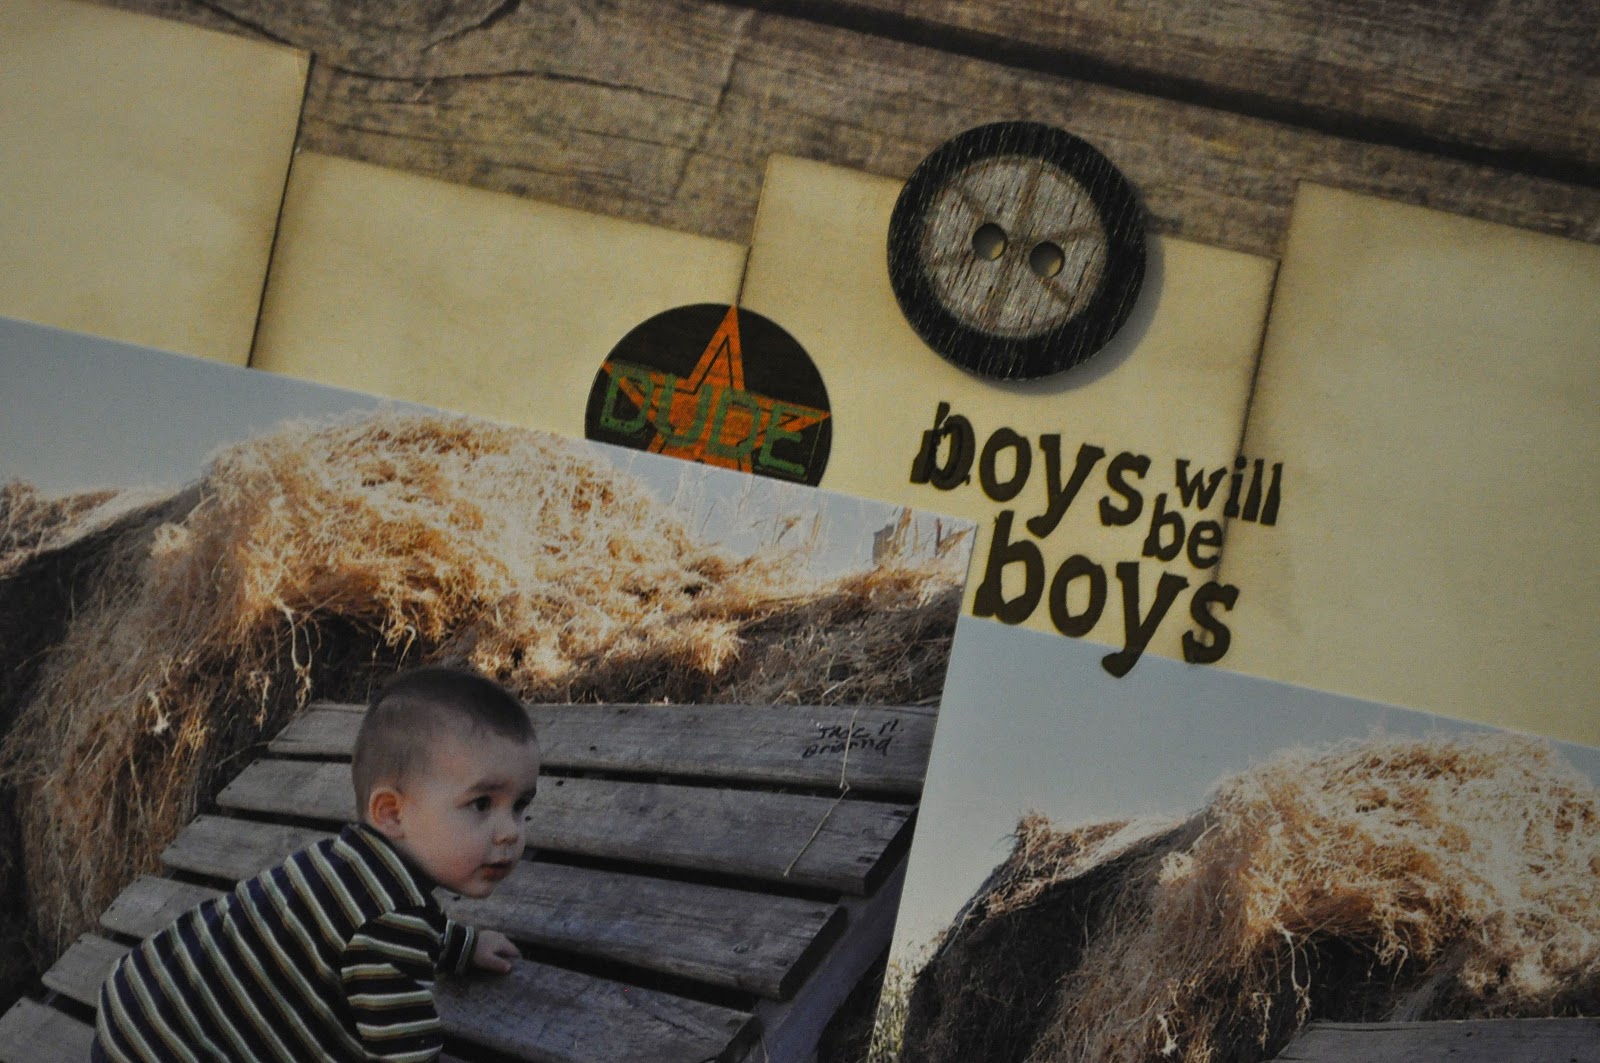
My husband got a sequence of pictures showing my son jumping off a bale and this paper from the BoBunny Detour line went perfectly!


I also used some Jillibean corrugated alphas and some Prima wooden buttons from the Craftsman line to give it a more outdoorsy look.

I love this next layout of my nephew being adventurous! He was trying so hard to get up on the bales so he could run around and chase after his cousin!


 The pattern paper I used for the background was from the Echo Park Homemade line. I was really lucking out when I was working on these pages to have found such perfect paper!


To finish off the layout I just raided my stash and used bits and pieces of leftover stickers and rub-ons that I had been "collecting"!


I was kicking my self for not grabbing some of the straw from the bales to use in my scrapbooking! What kind of scrapbooker am I! LOL

Again this next layout is of another of my cutie nephews! Oh to just be able to curl up in someones arms all cozy like that and have a nap! That would be the life!


The chipboard clouds I used in this layout are by Petaloo. I contemplated painting them but then decided that they would look best left raw. So all I did to them is ink the edges using my Tim Holtz Blending tool and some Pumice Stone Distress Ink. Then I took my Pumice Stone Distress Marker and stitched around the edge!


Now this last layout I wanted to make special. The picture is of my daughter on the day of her 13th birthday! Up, officially a teenager! (EEK!)


I used a paper from the Studio Calico Elementary line and gathered a bunch of scraps of a bunch of things to finish it off! I also used a Chicken Wire stencil from Crafters Workshop and Pumice Stone distress ink on the background. It was a little tricky because the stencil was so thin but the effect was worth the effort! I think using a misting spray would have been easier but I didn't have the right color.


Even though I look at others who do beautiful layouts with tons of layers and think they are absolutely stunning, I myself don't normally scrapbook that way. But every once in a while I come across a picture that is worth some extra attention!


Now just some extra info you may be interested in...

There are still spots left for Crop & Create in Saskatoon for those of you who have yet to sign up! Just send me an email at cayla.gaudet@gmail.com and I can forward the info to you or click HERE! I am so looking forward to going this year and having some good times with friends and hopefully getting some layouts done!!!! I hope to see you there too!

Also be sure to sign up at the store for our 2nd Annual Christmas Round Robin! We are taking registration now! Last year we sold out so be sure to give us a call or stop in soon!

Have a fantastic day!!


The Great Outdoors...

Hi Friends! Just trying out this blogging thing again! :D I wanted to share some layouts I did this past weekend while attending a fu...