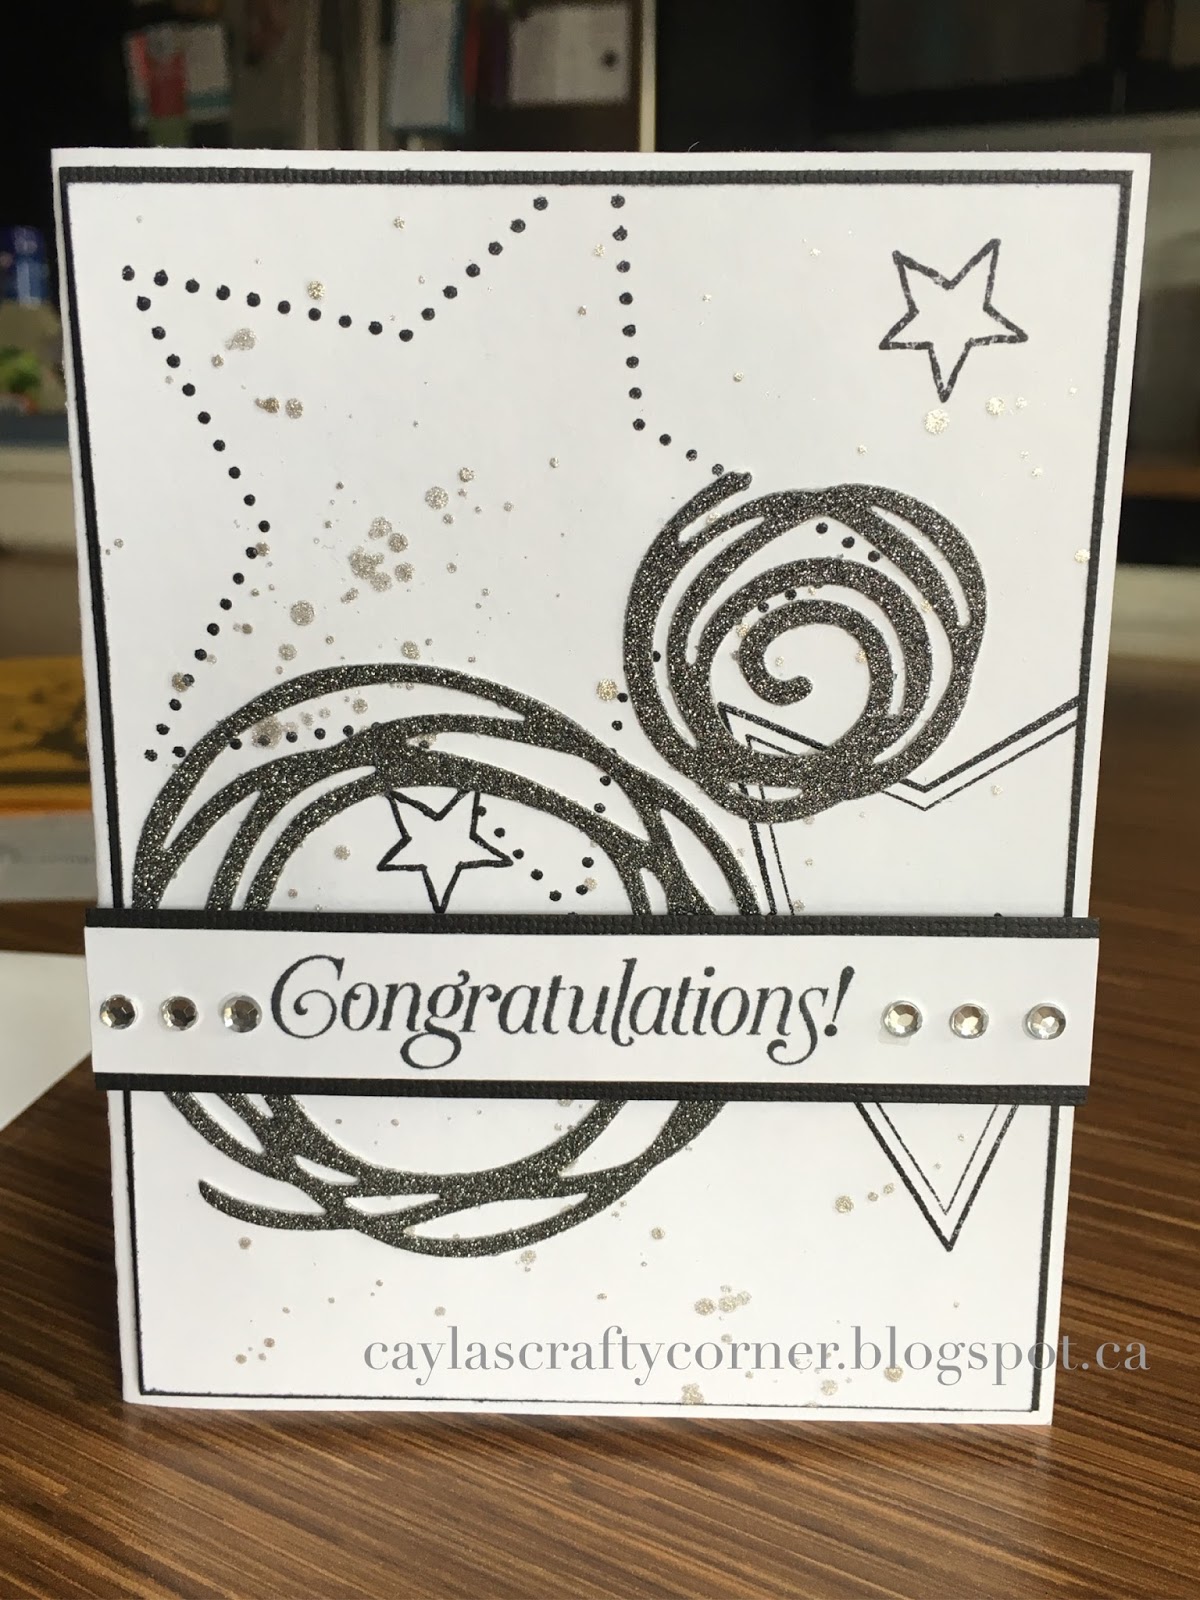
Tuesday 26 March 2019

The Great Outdoors...

Hi Friends!
Just trying out this blogging thing again! :D

I wanted to share some layouts I did this past weekend while attending a fundraising crop in Saskatchewan that was hosted by some amazing breast cancer survivors! 

One of my favorite places to visit every summer is Elbow Falls just west of Calgary. I love exploring along the river and being calmed by the sound of the water as it flows by. So I created these layouts using pictures of one of the many adventures we had there.

I purchased this super awesome open sky paper from a gal who was selling Creative Memories at the crop. I thought it would go well with this picture. I used the Up & Away thinlit dies from SUP! (Stampin Up!) to make the clouds, stitching stamps from Prima (edges), random washi tape and a title from a package of laser cut titles that are also Creative Memories.


These next couple of layouts were made using Simple Stories wood grain pattern papers (backgrounds) and some beautiful paper I picked up at a new, super cute, scrapbook store in Dalmeny, SK! (Which you really need to check out if you are in the area!)


I thought I was being pretty clever wrapping my journaling around the paper blocks. I think it turned out well! :D 

The little popped up embellishments were fussy cut from the pattern paper and I decided against adding a big flashy title because I didn't want to take away from the beauty of the picture.


The title on this last page was again from the Creative Memories pack plus I also bought a package of laser cut borders which I love!!


And of course I had to add in the stitching on the edges (I just can't seem to leave the edges alone! LOL!) and some sequins to embellish!


Thanks for stopping by!
~ Cayla ~

Monday 22 January 2018

It's a Beautiful Butterfly!

Good morning fellow crafters!
Today I start my 10 days in a row working so I wanted to get this post in before I got to distracted.

I made this card this past weekend for one of my cute little nieces that is turning 5. I know it is not a typical little girl card but I known she will like the bling! :D

The 2 stamps sets I used for this card were Swallowtail and Hello stamp sets from Stampin Up!  I know these stamps are no longer available to buy directly from Stampin Up, but if you can find them on a buy/sell group, they are well worth it!

First I stamped the butterfly in Momento ink (Black Tuxedo), then I used Spectrum Noir alcohol markers (BT2, BT4, BT7 and BT9) to color it in. When using alcohol markers, it is important to use the right ink (such as Momento ink) to stamp your image so it doesn't bleed. I then cut out the butterfly to attach to the card. I used dimensional foam adhesive behind the larger wing to give it the look like it is going to fly off the card!


The background was made using Island Indigo ink and stamping the Hello without reinking, which gives the multi shades of the same ink. The "birthday girl" image was stamped using Pool Party ink, then cut out and attached to the card using dimensional foam adhesive. I then used Glossy Accents to give the image an epoxy look. 

Lastly, I added some sequins to give it a more blingy look!


To see a detailed video on how the butterfly was colored, watch HERE. I did not use any coloring pencils like she did in the video, just the alcohol markers, but I think it still turned out pretty good!

Thanks for stopping by!
~ Cayla ~

Saturday 6 January 2018

Well Hello!

Well Hello!
It seems to be that as soon as winter hits, I have time to craft more often! So I just wanted to share these cards I made over the last couple weeks. I was inspired by cards I had seen on Pinterest, so please feel free to go check out my boards to see the original creations.


This first card was one made using the Softly Falling SUP embossing folder and the Lift Me Up SUP stamps and dies. I changed it from the original a wee bit by brushing the edges of the white and the clouds with Smoky Slate ink. I also used a lighter grey (Smoky Slate) cardstock. The greeting was made using the Birthday Banners SUP stamp set.


This next card was super fun to make! I used the Oh So Succulent SUP stamp set and dies to create this lovely little pot of succulents. The back ground behind the pot was made using water color paper and Burmuda Bay & Pear Pizzazz SUP inks. I just sprayed the paper with water and then used my aqua painter to brush ink across the front, blending a bit in the middle. After it was somewhat dry I then flicked ink onto the background using the aqua painter to get a spotty look.


This next card has such an elegant feel to it and is made using some of my fave cardstock, Crumb Cake. I embossed the floral image using white embossing powder and added a glitter strip to the side by using white cardstock and Platinum Stickles.


This last card is made using one of my fave color combos! The SUP inks I used were Hello Honey, Island Indigo and a touch of Blackberry Bliss. The SUP stamp sets I used were Gorgeous Grunge and Flowering Fields.


Thanks for checking my blog out! I hope to chat again soon!

~ Cayla ~

Thursday 2 June 2016

Scribbles and swirls...

Yesterday the new 2016-2017 Stampin Up! catalog went live and it is fabulous!!! You can check out the link HERE for the pdf version (might take a minute or two to upload) or if you're like me and need that hard copy to check off all the lovely new goodies you MUST have, let me know and I can get you a hard copy ASAP!

There are so many fantastic new items you will want to check it out for yourself, but here are a couple of projects I have done using some of the gorgeous new items...

This first card I did for a newly graduated gal that lives down the street from me. It is such an exciting time to realize that your high school journeys are over but new adventures are ahead! I wanted to make something that really showed my excitement for her.


The moment I saw the Swirly Scribbles thinlits dies, I knew I had to have them!  And I must say they are pretty awesome!

I apologize in advance because a couple of the elements on this card are no longer available, but I really love how the scribbles die looked on this card!


Another of my fave items is the Wink of Stella glitter brushes! They are super easy to use and I love flicking them across my projects to give that glittery splatter effect.

This next project I made was inspired by a project I pinned on Pinterest. You can check out the original project HERE. I just loved the cute little mini magazine holder and the soft colors!


Using this tutorial, I was able to easily make the mini holder.


 To make the cards I used one of the new hostess stamp sets, Gift of Love, and Endless Birthday Wishes stamp set. The ink is Pear Pizzazz and Pool Party

To create the little flower on the outside of the holder, I used the little flower die from the Swirly Scribbles thinlits dies and whisper white cardstock. I then inked them using the Pear Pizzazz ink and  a sponge.


Be sure to check out the new catalog and let me know if there is items that you can't live without! Or you can shop my online store HERE!

~Cayla~

Sunday 1 May 2016

Bright, Sunny Days...

Good morning! I hope your day is starting like mine, beautiful and sunny! This is going to be a quick post this morning. I just wanted to share this card I created for my cousins upcoming wedding using a couple of the retiring items from the Stampin Up! catalog.

To check out all the retiring items, click HERE!

I found a stunning card on Pinterest to use as inspiration and I just loved how it turned out!


I stamped the flowers using the Blended Bloom stamp and Hello Honey ink. I then cut them out using different petals to cut around to get the flowers in different sizes.

The band around the front of the card is made using vellum, white card stock that I stamped a scripty image on and some Natural 7/8" Cotton Ribbon (which can be found in the discontinued section).


I then attached the flowers and some gold sequin trim. The little tag sentiment was made using one of the sentiment from the Beautiful Ride stamp set and inking around the edges.


The band slides off and you can see the soft white hearts I used to decorate the card front using the Hearts decorative mask, Whisper White ink and sponge daubers. I then added a couple of gold sequins that I had pulled off the gold sequin trim.

On the inside of the card I added another stamped flower and gold sequin. I also left plenty of space to add a personal message to my cousin and her new husband.


Place an order with me or on my online store for any of the items used in this project and I will send you the complete instructions on this project plus a special gift!

Thanks for stopping by!
~ Cayla ~


Thursday 17 March 2016

Bright and Bold...

When it comes to choosing colors to work with for my cards I am totally drawn to softer, warmer colors. I love using white or kraft cardstock for my card bases and choose color palettes that are soft or monochromatic.

But what do I do then with all these bright, bold colors I have in my cardstock stash??

I suck it up, put my big girl panties on and get busy creating! :D


The bright pink in this card is soooooo not my style and I really had to push myself to finish it and not run away crying! Lol! Once I was done, thanks to some Pinterest inspiration, I felt pretty proud of myself! But it still seemed to be missing something...

Yup, that's better! I grabbed my fine-tip marker and added some faux stitching to finish the look!


The sentiment was a wee bit disappointing. When stamping onto vellum, it can be a bit tricky. I used my Jet Black StazOn ink so that it would not smear off, but you have to be careful not to press to hard or your stamp will slide and you get a smudged image. So the next time I try stamping on vellum, I think I will use a stamp that is not quite so solid so I get a cleaner look.

I would love to hear from you! What colors do you gravitate towards? Are you a scaredy cat like me or do you embrace the bright and bold?

~ Cayla ~

There are only 13 days left in Sale-A-Bration! For every $60 of product you order, you can choose any item from the Sale-A-Bration catalogs for FREE! Click on the links below or off to the side of this post to check out the free items you could receive! :D

Sale-A-Bration I  (last three items in this catalog were a limited time deal until February. Click next link for the new three items available)


Sale-A-Bration II


The Great Outdoors...

Hi Friends! Just trying out this blogging thing again! :D I wanted to share some layouts I did this past weekend while attending a fu...