Monday 30 April 2012

A Campin & a Croppin I Went!!

OMG!! Can you say "SPOILED"!!


 After spending three days with a couple of the leading companies in the scrapbook industry, I have to say I was definitely spoiled!! As you can see, my table is covered in loot and not everything is even showing!! The bag in the very back of the picture is FULL of the classes I took (I will blog about them later!) and some of the loot was put to use already!!

Lori (the fabulous owner of Saskatoon's Scrapbook Studio and my lovely boss!) and I arrived in Calgary on Wednesday evening and got all settled in to our hotel room so that we could get up bright and early the next morning to go "shopping" at the Scrapbook Eh! Warehouse!!!! (SHRIEK!!) We proceeded to spend over five hours drooling up and down every isle and I am sure we could have spent more time there if they hadn't have kicked us out!! Lol!

The next morning we were up and at 'em early again to attend the Education Eh! Seminar (put on by the fabulous Scrapbook Eh! staff!) Here, we got to hear from some fabulous speakers from companies such as BoBunny, Basic Grey, Canvas Corp, Graphic 45 and create gorgeous projects which I will post more on later!

 The Carriage House Inn fed us a fabulous breakfast of fresh baked, still warm pastries and muffins (from their in-house bakery!!), coffee, juice, yogurt, fruit and cereal and also a fabulous southwestern style lunch that was sooooo good!!! They really know how to fill a persons belly!! Lol!


After attending the seminar, it was time to check in to Camp Croppin!!! (More shrieking!!) What a fabulous time cropping, taking classes and doing make 'n takes!! I would totally recommend this event to anyone looking for a fabulous croppin retreat!! They had phenomenal contest & door prizes!! 
Not only did I win one Quickutz Revolution die-cutting machines, but TWO!!!! It was a very laughable moment when my name was called for that second one!! LOL


I was super excited also to get a chance to be a "Tent Mom" (basically a helper for the teachers) for the Canvas Corp class! The class was taught by the founder of Canvas Corp, Christine Meier, who was so super awesome and her equally awesome side kick Michelle! They did a fantastic job and I was thrilled to be able to give them a hand with the class!  
And not only was I reimbursed for the class (which I had previously paid to be a student in) but I also got to take the class project kit home and a bag full of goodies to complete the project!!!!
As soon as I have the project to complete the gorgeous project, I will post pictures!!


The above picture is of a door prize I won that included twelve packages of Petaloo Fabric and Glitter Flowers in every color and a stack of BoBunner Enchanted and Smoochable pattern papers!! 

And the below picture is just of more loot I received!!


Well I better go clear off my table so that my husband and kids can eat supper on it this evening! 
(My husband just cringes whenever I drag out my scrapbooking stuff! LOL)

Thanks for stopping by and check back later this week for some pics of the classes I took!

Tuesday 24 April 2012

BANNERS!

Well the last week and a half have seemed to speed on by for me as I plan so many exciting projects for the next month or so! And to top it all off, I am leaving to go to Alberta tomorrow to attend a retailers event with my boss and to spend the weekend at the much anticipated Camp Croppin!!
 I am so super excited to be going this year for the first time and joining some of my crafty friends in two days of jammed packed scrappy fun!!

It seems like lately I have been sticking to the trends and using cute little banners on my scrapbook pages and projects. So before I pack up my stuff and head out the door, I wanted to share a quick little trick I found to really help when making the ends of my banners!


First I cut a line straight up the center about 1/2 inch. So you then have a piece that has what looks like two legs.


I then cut from one corner diagonally up to the top of the first line I cut, taking out a smaller triangular piece.


I then proceed to do the same to the other corner and DONE!
For me it works just about perfect every time!

Check out my CARD IDEAS and SCRAPBOOKING boards on PINTEREST for some great project ideas using banners!
(Click on each project to be directed to original source.)

Be sure to check back next week to see what I was upto in Alberta!!


Tuesday 17 April 2012

SWEET CHILDHOOD MEMORIES!

Well it's a gloomy, cloudy Tuesday and the snow is trying to come again, so it seems to me like the perfect day to do some scrappin!!
 
I was thinking back the other day and remembering some sweet childhood memories. I remember growing up and spending countless hours running around with a pinwheel on a stick or blowing on it until I was dizzy, just to see it spin! And it puts a smile on my face to watch my children enjoying the same simple pleasure!
 
I've recently learned a very easy technique to creating fabulous little pinwheels which are such a great way to add that fun and whimsy feel to your projects!
Below is a card I created for my nephew's birthday this summer and the technique I used to create the cute little pinwheels! 
 
First I cut two squares of pattern paper. I find that using patterns that are very contrasting on both sides works the best. So here I have paper that is a dark brown solid on one side and then the stripes on the other. Also the size of your squares doesn't matter as long as they are square! (My squares are 3x3 and 2x2 inches)


Next I folded the squares diagonally. 
This helps me know where to cut and where the center is.
 

 Cut along the diagonal line starting at a corner and cutting about half way to the center. DO NOT cut to close the center or you might find that your pinwheels will be to flimsy! Continue until you have four cuts.


Now bring one corner from each section to the center and glue down. I find that adhering the two corners across from each other is helpful to making them all line up but it is whatever is easiest for you! You will probably eventually be covering the center with an embellishment of some sort, so if you are a little crooked it won't matter.
 

Just remember to adhere only one corner form each section or your pinwheel will look a little funny! this might take some trial-and-error to figure which corner to stick down.
 

Once you have the four corners stuck down you can then go ahead and embellish the centers! I chose to punch out little scalloped circles and place a brad through the center.


Enjoy the rest of your day!!


Monday 2 April 2012

I LOVE LACE!!

In the past few days the Scrapbook Studio (where I happily work!!) received an order of some beautifully crocheted lace and I was reminded of how much I love lace!!! So I decided to share some of my favorite ways to use it!!

Below are a couple of layouts I created (one of which can be seen in more detail in my "Getting Time For Me" post). 


I love how delicate lace looks and how it is available in so many different widths, styles and colors!!
I find the best way to adhere the lace, is to use scor-tape (or other preferred super tacky tape) or by using a hot glue gun.


And by layering the different laces, I was able to get some more texture and dimension!!


The next images are lacey projects that I happened to find on Pinterest!! (Yes, another one of my many addictions!! LOL) These projects are on my many to do lists!! Click on the highlighted titles below each pic to be directed to the source!


(I am sorry, I couldn't find a link to go directly to this card, but her website has some very lovely ideas!!)


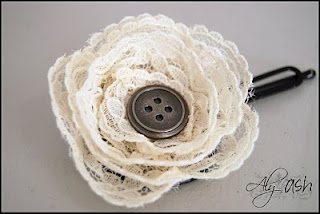
Lace Flowers
These beautiful flowers can be made using several different techniques. 
 
  1. Sew a loose stitch closer to one end and then pull the thread to gather the lace. Tie the thread in a knot and adhere to your project.
  2. Using a Gluber or a large Glue Dot, start adhering the lace, starting at the outside edge and working your way to the center. 
  3. Apply Scor-Tape (or other super tacky tape) to the back of the lace and start adhering to your project (or a small circle shape piece of cardstock) starting from the outside edge and working towards the middle.  
AFTER CREATING YOUR FLOWERS, FINISH OFF BY ADDING BUTTONS, RHINESTONES, PEARLS, ETC TO THE CENTERS!!

These are just a couple of my fave ways to use lace and I would love to hear from you about your favorite ways to create with lace!!!

The Great Outdoors...

Hi Friends! Just trying out this blogging thing again! :D I wanted to share some layouts I did this past weekend while attending a fu...